
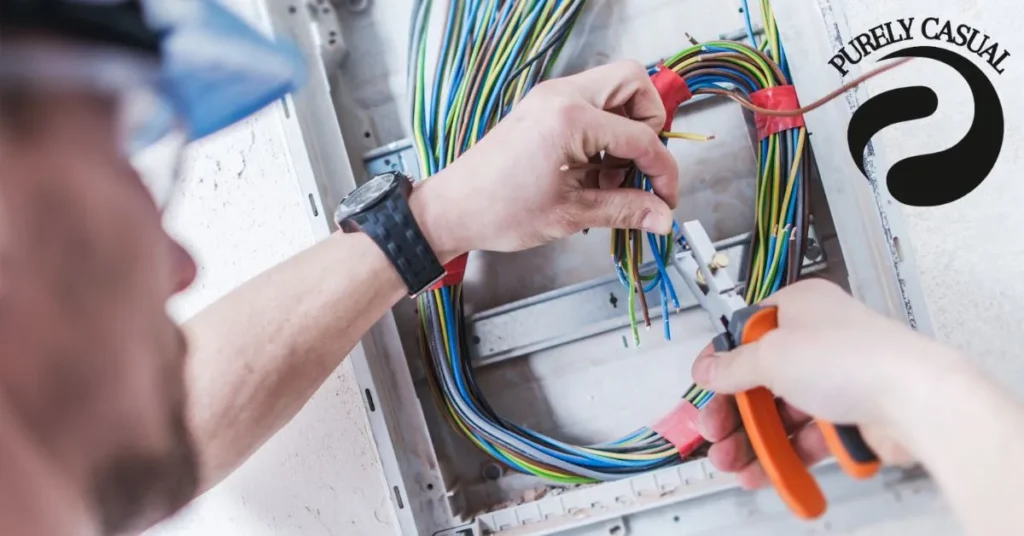
The DL14-00 is a widely used component in electrical systems, known for its reliable performance. It plays a crucial role in powering and controlling various devices in industrial and commercial applications. Ensuring the correct wiring of the DL14-00 is essential for safety and efficiency.
This component is often found in complex electrical setups where precision is key. Proper installation helps avoid electrical faults, short circuits, or damage to other connected equipment. Following a proper guide for the DL14-00 is the first step to a successful setup.
Before you begin, it is important to understand the wiring diagram for the DL14-00. This diagram provides essential information about which wires go to specific terminals. Misreading the wiring diagram can lead to improper connections and system failures.
Having the right tools and materials for the job is also critical. Using the correct wire gauge, connectors, and tools like multimeters ensures that all connections are safe and secure. Safety equipment, such as insulated gloves and safety glasses, helps protect against electrical shocks during installation.
Testing the wiring is another vital step in the process. Using a multimeter to check for proper voltage and continuity ensures that the DL14-00 is connected correctly. It also helps in identifying any potential wiring mistakes early on.
By following a step-by-step approach and using the correct tools, you can install the DL14-00 efficiently and safely. This guide will cover everything you need to know to complete the process without complications.
Table Of Contents
Tools and Materials Needed for Installing the DL14-00
Before starting the process, it’s essential to gather the right tools and materials. Using the appropriate equipment will make the job easier and safer. Below is a detailed list of everything you’ll need.
Essential Tools for DL14-00 Installation
You will need several basic electrical tools for this project. These include a wire stripper, crimping tool, and a screwdriver set. A multimeter is also important for testing the connections after installation.
Make sure to use tools that are in good condition. Damaged or worn-out tools can lead to improper installation or even electrical hazards. Keeping your tools organized and easily accessible will also speed up the process.
Required Materials for DL14-00 Setup
The type of wire you use is crucial for ensuring a secure connection. Typically, you’ll need insulated copper wires with the appropriate gauge for your system. The wiring diagram will indicate which gauge to use based on your electrical load.
Additionally, you’ll need terminal connectors and electrical tape. Terminal connectors help in securing the wires to the DL14-00, while electrical tape is used to cover exposed wires. Using high-quality materials helps in preventing loose connections and ensures long-lasting performance.
Safety Equipment for Electrical Work
Safety should always come first when working with electrical systems. Always wear insulated gloves and safety glasses to protect yourself from electric shocks. These items can be lifesaving when dealing with live electrical components.
You should also keep a fire extinguisher nearby, just in case of an emergency. Proper footwear with rubber soles will further protect you from any accidental shocks. Never start without ensuring all safety measures are in place.
Pre-check Requirements for DL14-00 Installation
Before starting, it’s crucial to perform some basic checks. First, make sure the power is off to avoid any risk of electric shock. Double-check the compatibility of your DL14-00 with the existing electrical system.
Inspect the DL14-00 itself for any visible damage or defects. Confirm that you have all the necessary tools, materials, and safety equipment on hand. Once everything is ready, you can proceed with the installation safely and efficiently.
Step-by-Step Guide to Installing the DL14-00
Now that you have all the tools, materials, and safety equipment, it’s time to start the installation. Follow this step-by-step guide carefully to ensure proper setup. Each step is designed to make the process straightforward and easy to follow.
Preparing the Workspace for DL14-00 Installation
Start by setting up a clean and safe workspace. Ensure that your work area is well-lit and free of any clutter. This will make it easier to focus on the installation process and avoid mistakes.
Turn off all power to the electrical circuit where the DL14-00 will be installed. Double-check that the power is off using a multimeter. This will protect you from potential electric shocks during the installation.
Understanding the DL14-00 Wiring Diagram
Before you begin connecting wires, take a moment to study the DL14-00 wiring diagram. The diagram will show you where each wire needs to be connected. Make sure you understand which terminals correspond to which wires.
If you’re unsure about any part of the diagram, refer to the DL14-00 manual or consult a professional. Misreading the diagram can lead to improper connections, which could damage the component. Taking your time here will save you from making costly mistakes later.
Installing the DL14-00: Step-by-Step
Step 1: Start by identifying each wire and its corresponding terminal. Use the wiring diagram as a reference to match the correct wires to the correct terminals. Make sure the wire ends are stripped and ready to connect.
Step 2: Connect the wires to their designated terminals. Tighten the terminal screws securely, but be careful not to over-tighten. Loose connections can cause faults, while over-tightening can damage the wires or the terminal.
Step 3: After connecting all wires, double-check each connection. Make sure every wire is securely fastened to its terminal. Use electrical tape to cover any exposed wires and ensure that no wires are touching each other.
Step 4: Use a multimeter to test the continuity of the connections. This will ensure that the wires are properly connected and there are no breaks in the circuit. A successful reading means the installation is correctly done.
Common Installation Mistakes to Avoid
Avoid connecting wires to the wrong terminals by carefully following the wiring diagram. A common mistake is confusing the positive and negative terminals, which can cause malfunctions. Double-check each connection before powering on the system.
Another mistake to avoid is leaving wires loose. Loose connections can result in electrical shorts or poor performance. Always make sure the wires are tightly secured to prevent any issues.
Over-tightening the terminal screws is another common problem. It can damage the wire or the terminal itself. Make sure to tighten the screws just enough to hold the wire securely without causing damage.
Final Check Before Powering On
Before you power up the system, go through a final check. Ensure all wires are correctly connected and that no loose or exposed wires remain. Make sure the area is clean and that no tools or materials are left near the electrical components.
Once satisfied, you can proceed to the testing phase to verify the installation. Proper preparation and careful attention to detail will ensure a safe and effective DL14-00 setup.
Testing and Troubleshooting the DL14-00 Connections
Once the installation is complete, it’s important to test the connections before fully operating the DL14-00. Proper testing helps to ensure everything is working as expected. Follow these steps to test and troubleshoot the connections for any issues.
Initial Power-On Test for DL14-00
Turn on the power supply to the DL14-00 system. Monitor the system carefully for any signs of issues like sparks, strange noises, or overheating. If everything seems normal, proceed with further testing.
If you notice anything unusual, immediately turn off the power and inspect the connections. A quick check can prevent damage to the system and ensure safety.
Verifying Proper Operation of DL14-00 Connections
Use a multimeter to test the voltage across the terminals of the DL14-00. This will confirm that power is being correctly supplied to the component. Ensure that the voltage reading matches the specifications provided in the wiring diagram or manual.
Next, check for continuity across the circuit. This ensures that the connections are complete and there are no breaks or loose connections. If the readings are correct, the installation has been successfully completed.
DL14-00 Troubleshooting Guide
If the DL14-00 does not power on, start by rechecking each wire connection. Make sure all wires are properly attached to the appropriate terminals and that none are loose or damaged. You may need to tighten the terminal screws or replace a damaged wire.
If the system powers on but malfunctions, check the polarity of the connections. Incorrect wiring of positive and negative terminals is a common mistake that can cause system failure. Fix any reversed connections and test again.
In cases of overheating, check the wire gauge to ensure it matches the system requirements. Wires that are too thin for the load can cause excessive heat. Replacing them with thicker wires may solve the issue.
When to Call a Professional for DL14-00 Issues
If troubleshooting does not resolve the problem, it may be time to call a professional. Certain issues, especially those involving complex electrical systems, require expert attention. A professional can identify hidden problems that might not be obvious to someone without advanced electrical knowledge.
Continuing to use a malfunctioning system without addressing wiring issues can lead to further damage. Always err on the side of caution and seek help if you are unsure about any part of the installation.
Maintenance, Best Practices, and Final Thoughts
After successfully installing and testing the DL14-00, regular maintenance is key to keeping it functioning properly. Following best practices will help extend the lifespan of the component and prevent potential issues. Here are some tips for maintaining and optimizing your DL14-00 system.
Routine Maintenance for DL14-00 Connections
Regularly inspect the connections for any signs of wear or damage. Look for frayed wires, loose connections, or corrosion around the terminals. Catching these issues early can prevent system failure.
Periodically test the connections using a multimeter to ensure that the voltage and continuity are still within safe limits. If anything seems off, troubleshoot and make repairs immediately. Keep the area around the DL14-00 clean and free of dust to avoid overheating.
Best Practices for Long-Lasting DL14-00 Performance
Always use the correct wire gauge for your system. Using wires that are too thin can cause overheating, while thicker wires ensure the DL14-00 runs efficiently. Following the specifications in the wiring diagram will prevent any power issues.
Ensure that all wire connections are tight but not over-tightened. Loose connections lead to poor performance and potential electrical shorts. If you make any changes to the wiring, double-check each connection before powering on the system again.
Regularly review the DL14-00 manual for any updates or additional instructions. Manufacturers may release information to improve performance or safety, so it’s important to stay informed.
Future-Proofing Your DL14-00 System
When making changes or upgrades to your electrical system, consider leaving room for future expansion. Using flexible wiring setups allows for easy adjustments later without needing to redo the entire system. This makes it easier to adapt if you upgrade to new components.
Additionally, label all wires during installation for easy identification. This will make future troubleshooting or repairs quicker and more straightforward.
Conclusion
Installing the DL14-00 can be a smooth and successful process if you follow the correct steps and stay mindful of safety. Proper maintenance ensures long-lasting performance, while best practices help avoid potential issues. With careful planning, your DL14-00 system can stay reliable and efficient for years to come.
FAQs
What is the DL14-00 used for?
The DL14-00 is commonly used in industrial and commercial electrical systems. It plays a key role in controlling and powering various devices.
What tools do I need to install the DL14-00?
You will need basic electrical tools such as a wire stripper, screwdriver, crimping tool, and a multimeter. Always have safety equipment like insulated gloves and safety glasses when working with electrical systems.
How do I read the DL14-00 wiring diagram?
The wiring diagram shows which wires need to be connected to specific terminals. It’s important to follow the diagram carefully to avoid incorrect connections, which can cause malfunctions or system failure.
What wire gauge should I use for installing the DL14-00?
The wire gauge depends on your electrical load. Check the DL14-00 manual or wiring diagram to see the recommended wire gauge for your specific setup.
How do I test the DL14-00 connections after installation?
You can use a multimeter to test the voltage and continuity of the connections. This ensures that the connections are correct and that there are no breaks in the circuit.
What should I do if the DL14-00 doesn’t power on after installation?
First, check that all wires are correctly connected to the appropriate terminals. Make sure none of the wires are loose or damaged. You may also want to check the power source and verify that it’s functioning correctly.
How can I prevent overheating in the DL14-00 connections?
Ensure that the correct wire gauge is used. Wires that are too thin for the electrical load can cause overheating. Regular maintenance and cleaning also help prevent overheating.
Can I fix installation mistakes myself?
Yes, many common installation mistakes, such as loose connections or reversed polarity, can be fixed. However, if you’re unsure about the installation or the issue persists, it’s best to consult a professional.
How often should I inspect the DL14-00 connections?
It’s recommended to inspect the connections every few months for signs of wear, loose connections, or corrosion. Regular checks help prevent bigger issues down the road.
When should I call a professional for DL14-00 issues?
If troubleshooting does not resolve the problem, or if you’re uncomfortable working with electrical systems, it’s best to call a professional. Continuing with a malfunctioning system can lead to further damage or safety risks.